Set during the Year of the 4 Emperors 69AD, Bedriacum (or the second Cremona) was the battle to decide who would be the final Emperor for that year. Vitellius had claimed the prize after a bloody struggle, but Vespasian didn't agree & sent his own army to Italy from the East. This is the main resulting battle.
.
More info on the battle from =
http://en.wikipedia.org/wiki/Battle_of_Bedriacum
.
Cracking Map of the Battlefield= http://www.ourcivilisation.com/smartboard/shop/tacitusc/histries/map2bic.htm
.
Second Battle of Bedriacum / Cremona Date: 69AD
Location: near Bedriacum and Cremona
Combatants: Vespasianus' Forces vs. Vitellius' Forces
Vespasianus' Forces Commander: Marcus Antonius Primus
Vitellius' Forces Commander: (?)
Result: Vespasianus' forces victory
Vespasianus' Forces Strength: 5 Legions? (III Gallica, VII Claudia, VII Gemina, VIII Augusta, XIII Gemina)
Vitellius' Forces Strength: 4 Legions (XXI Rapax, V Alaudae, I Italica, XXII Primigenia), Vexillationes from 7 other legions, and Auxiliaries.
(Reference Roman Army Forum=
http://romanarmy.com/rat/viewtopic.php?t=15563&start=20 )
Bedriacum the inital disposition of the Legions, Vespasian had more troops available. Using the Army notes available, it was always going to be difficult imposing the 36 element BBDBA framework. We added a few more elements to make up the numbers. however we still have smaller Legions that what I would of liked, anywhere between 4 -6 bases strong. We settled for 40 elements for the Vitellians & 44 for the Vespasians.
Our interpretation of Bedriacum, Legion numbers marked & separate detachments. The Praetorian Guard elected to fight for Vespasian. The OurCivilisation.com map makes special mention that a lot of Vespasian Auxilia fought on the flanks, so we copied this in the set-up. The next map is the layout with DBA troops on the battlefield.

 Terrain is a scenic mat, Road & River (treat as minor) as Battlefield plan. Urban areas represented by some buildings or Ruins. A few extra pieces, Rough, Orchard, Rocky Hill added to spice up the game. To be honest they didn't make any effect on the outcome. Jack would take the Vespasian force & I the Vitellians.
____________________
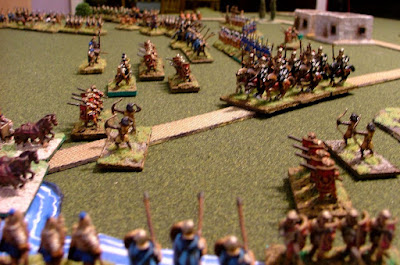
The battle begins, view of the Vitellians. Concentrated Artillery, Blades & Auxilia.
.
Vespasian troops, Blades, Artillery, Psiloi. In the right background can be seen the Praetorians.

.
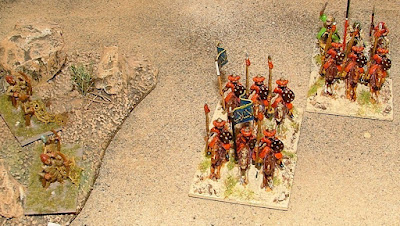
The Praetorians march to battle. They would act as a nice reserve force.

.
The Praetorians march to battle. They would act as a nice reserve force.
.
.
The fight in the South, Auxilia & Cavalry force the River. Allied Gallic Cavalry force the first combat..... typically Jack rolls well & forces the Gauls to Recoil.


.
.
Another view of the Centre


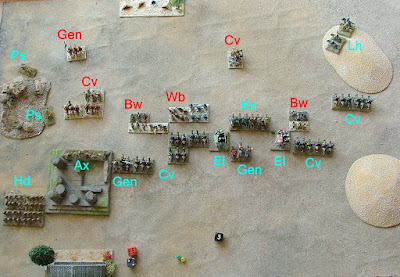
First of the Overall Battlefield views, with Army labels. Taken from the North looking South across the battlefield.


First of the Overall Battlefield views, with Army labels. Taken from the North looking South across the battlefield.
.
The fight in the South is going well for the Vitellians & slowly get the upperhand.
.
The centre is a stalemate despite the Vespasians having more blades there.
.
The foreground, in the North, I elected not to engage on mass & to give ground.
.
.
The turning point in the battle coming up (in my humble view). Blade vs Blade combat, good rolls on both sides kept the balance....
.
.....Until I managed to roll four 1's in a row, Jack takes the opportunity & manages to destroy two Blades. From this point on the centre would collapse dramatically!!!


.
However in the South the combo of Cavalry, Blades & Auxilia start to take their toll on Jacks Vespasians crossing the river.
.
.
The Northern flank again looking into the centre. Jack had a good match up with his Blades facing Auxilia.


.
.
.

Overall Battlefield View, at this point the Vitellians centre is beginning to take the strain, all my reserves are committed. Jack still has the Praetorians to commit.

Overall Battlefield View, at this point the Vitellians centre is beginning to take the strain, all my reserves are committed. Jack still has the Praetorians to commit.
.
The North is still a stalemate.
.
The South is starting to show signs of promise for the Vitellians!!
.
.
Breakthrough!! The Vespasians are sent packing, the Cavalry legs it at full pelt back across the river. One broken command for Jack.


Ha! Laughs Jack & takes it in his stride. The position in the centre is far too good for him. A few pathetic rolls by me & the entire centre collapses..... oh the shame.
.
Meanwhile some minor skirmishes take place in the North.
Meanwhile some minor skirmishes take place in the North.
.
I look at the table.. the South is great but I can't see me being able to make it count & swing the troops northwards quickly enough.
.
.
Jacks wastes no time & brings his reserves into play. The Praetorian Cavalry advance. Jacks Blades hack through any opposition including the 'Heroic' Vitellian Artillery who fight to the last.
.
Some Vitellian troops manage to cross the river to help in the centre, but its too late.
.
.
With typical Roman ruthlessness Jack orders the Praetorians to charge the last resistance in the South. The casualty figures rising 'alarmingly' for the Vitellians.


The end is in sight. The Vitellians Casualties are appalling.


The end is in sight. The Vitellians Casualties are appalling.
.
The breakthrough in the South is my only consolation. All that stands between Jack & Rome is one General element!
.
I curse my poor planning & wished that I'd commited my northern forces.
.
The last stand required for victory is destroyed!!!!
.
The last stand required for victory is destroyed!!!!

.
.
.
The Battlefield casualties, well mine anyway 20+ elements.
The 'howls of Jack' are enough to send a man potty.
.
A mighty scrap indeed, with a painful head as well. This one took all day with a few breaks, including a 'Dr.Who' viewing at tea time (still the best thing on telly) .
.
Oh dear! What a bloodbath, even though we broke a command each. Jack breaking my centre was critical, he could exploit my weakness. I couldn't get the advantage from taking his flank, my troops had too much ground to cover. Cue the slaughter, Blades can be devastating & it showed in this one.


